1. 의존성
01/13(화)는 Spring Security 3.5.7 공식 문서를 정독한 날입니다.
LLM의 도움을 받아서 번역하며 핵심을 읽으니 나름 빠르게 이해한 것 같습니다.
저희 서비스는 OAuth + JWT 자체 발급 구조이므로 관련 파트를 중점적으로 읽었습니다.
// Security
implementation 'org.springframework.boot:spring-boot-starter-security'
implementation 'org.springframework.boot:spring-boot-starter-oauth2-client'
testImplementation 'org.springframework.security:spring-security-test'

// JWT
implementation 'io.jsonwebtoken:jjwt-api:0.12.6'
runtimeOnly 'io.jsonwebtoken:jjwt-impl:0.12.6'
runtimeOnly 'io.jsonwebtoken:jjwt-jackson:0.12.6'
먼저 build.gradle에 spring-security와 oauth2-client 의존성을 받았습니다.
oauth2-client 의존성은 카카오 api를 사용하지 않으므로 뺄까 싶었지만
인가코드 및 액세스 토큰 발급 절차를 간편하게 해준다는 편의성이 있어 추가했습니다.
JWT 의존성을 jjwt 의존성을 추가했습니다.
2. yml 설정파일
  security:
    oauth2:
      client:
        registration:
          kakao:
            client-id: ${KAKAO_REST_API_KEY}
            client-secret: ${KAKAO_CLIENT_SECRET}
            redirect-uri: "{baseUrl}/login/oauth2/code/{registrationId}"
            client-authentication-method: client_secret_post
            authorization-grant-type: authorization_code
            scope:
              - openid
              - account_email
            client-name: Kakao
        provider:
          kakao:
            authorization-uri: https://kauth.kakao.com/oauth/authorize
            token-uri: https://kauth.kakao.com/oauth/token
            jwk-set-uri: https://kauth.kakao.com/.well-known/jwks.json
            user-name-attribute: sub

jwt:
  secret: ${JWT_SECRET}
  access-token-expiration: 3600000  # 1시간 (밀리초)
  refresh-token-expiration: 604800000  # 7일 (밀리초)
  redirect-uri: ${JWT_REDIRECT_URI:http://localhost:5173/auth/callback?registered=%s&token=%s}

server:
  domain: ${SERVER_DOMAIN:localhost}
https://docs.spring.io/spring-security/reference/6.5/servlet/oauth2/login/core.html
Core Configuration :: Spring Security
If you are not able to use Spring Boot and would like to configure one of the pre-defined providers in CommonOAuth2Provider (for example, Google), apply the following configuration: OAuth2 Login Configuration @Configuration @EnableWebSecurity public class
docs.spring.io
https://developers.kakao.com/docs/latest/ko/kakaologin/rest-api
Kakao Developers
카카오 API를 활용하여 다양한 어플리케이션을 개발해 보세요. 카카오 로그인, 메시지 보내기, 친구 API, 인공지능 API 등을 제공합니다.
developers.kakao.com
위의 두 문서를 많이 참조하여 셋팅을 진행했습니다.
스프링 부트와 스프링 시큐리티를 같이 사용할경우 yml 파일만으로 많은 처리가 자동으로 이루어집니다만.
카카오는 스프링 시큐리티에서 자동 셋팅을 진행하지 않으므로
인가 uri과 토큰 uri, jwt 인증 url등을 따로 지정해주어야 했습니다.
기존에는 OIDC 대신 카카오 유저 엔드포인트를 사용할까 했는데,
이 경우 다른 OAuth2들과 다르게 id라는 값을 사용해서 유저를 구분하고, 유저 엔드포인트를 한 번 더 탐색해야 하므로
통일성 및 비용 측면에서 OIDC로 통일하였습니다.
3. Config
@Configuration
@EnableWebSecurity
@RequiredArgsConstructor
public class SecurityConfig {

    private final CustomOAuth2UserService customOAuth2UserService;
    private final OAuth2AuthenticationSuccessHandler oAuth2AuthenticationSuccessHandler;

    @Bean
    public SecurityFilterChain filterChain(HttpSecurity http) throws Exception {
        http
                .cors(cors -> cors.configurationSource(corsConfigurationSource()))
                .csrf(AbstractHttpConfigurer::disable)
                .sessionManagement(session -> session
                        .sessionCreationPolicy(SessionCreationPolicy.STATELESS))
                .formLogin(AbstractHttpConfigurer::disable)
                .httpBasic(AbstractHttpConfigurer::disable)
                .authorizeHttpRequests(auth -> auth
                        .anyRequest().permitAll()
                )
                .oauth2Login(oauth2 -> oauth2
                        .userInfoEndpoint(userInfo -> userInfo
                                .oidcUserService(customOAuth2UserService)
                        )
                        .successHandler(oAuth2AuthenticationSuccessHandler)
                );

        return http.build();
    }

    @Bean
    public CorsConfigurationSource corsConfigurationSource() {
        CorsConfiguration configuration = new CorsConfiguration();

        configuration.setAllowedOrigins(List.of("http://localhost:5173"));
        configuration.setAllowedMethods(List.of("GET", "POST", "PUT", "DELETE", "PATCH", "OPTIONS"));
        configuration.setAllowedHeaders(List.of("*"));
        configuration.setExposedHeaders(List.of("Authorization", "Content-Type"));
        configuration.setAllowCredentials(true);
        configuration.setMaxAge(3600L);

        UrlBasedCorsConfigurationSource source = new UrlBasedCorsConfigurationSource();
        source.registerCorsConfiguration("/**", configuration);

        return source;
    }
}
기본 설정이 있는 Config 클래스입니다.
cors 기본 설정을 해주었고,
리액트 클라이언트이며 소셜 로그인 + JWT 진행할 예정이므로 이밖의 설정들을 진행했습니다.
정확히 소셜 로그인만 구현하였으며, 유저 정보를 받아오고 토큰을 생성하는 로직만 구현했습니다.
4. 유저 정보 받아오기
@Slf4j
@Service
@RequiredArgsConstructor
public class CustomOAuth2UserService extends OidcUserService {

    private final UserRepository userRepository;

    @Override
    @Transactional
    public OidcUser loadUser(OidcUserRequest userRequest) throws OAuth2AuthenticationException {
        OidcUser oidcUser = super.loadUser(userRequest);

        String registrationId = userRequest.getClientRegistration().getRegistrationId();
        SocialType socialType = SocialType.fromRegistrationId(registrationId);

        String socialId = oidcUser.getAttribute("sub");
        if (socialId == null) {
            throw new OAuth2AuthenticationException("socialId(sub) not found");
        }
        String email = oidcUser.getAttribute("email");
        if (email == null) {
            throw new OAuth2AuthenticationException("email not found");
        }

        User user = getOrCreateUser(socialType, socialId, email);

        log.info("CustomOAuth2UserService - loaded user: id={}, email={}, socialType={}",
                user.getId(), email, socialType);

        return UserPrincipal.builder()
                .id(user.getId())
                .email(user.getEmail())
                .nickname(user.getNickName())
                .socialType(user.getSocialType())
                .socialId(user.getSocialId())
                .role(user.getRole())
                .status(user.getStatus())
                .attributes(oidcUser.getAttributes())
                .build();
    }

    private User getOrCreateUser(SocialType socialType, String socialId, String email) {
        return userRepository.findBySocialTypeAndSocialId(socialType, socialId)
                .orElseGet(() -> {
                    User newUser = User.createSocialUser(socialType, socialId, email);
                    User savedUser = userRepository.save(newUser);
                    log.info("New user created - id: {}, socialType: {}, socialId: {}, email: {}",
                            savedUser.getId(), socialType, socialId, email);
                    return savedUser;
                });
    }
}
@Getter
@Builder
public class UserPrincipal implements OidcUser {
private final Long id;
private final String email;
private final String nickname;
private final SocialType socialType;
private final String socialId;
private final Role role;
private final UserStatus status;
private final Map<String, Object> attributes;
@Override
public Map<String, Object> getAttributes() {
return attributes;
}
@Override
public Collection<? extends GrantedAuthority> getAuthorities() {
return Collections.singletonList(new SimpleGrantedAuthority(role.getKey()));
}
@Override
public String getName() {
return String.valueOf(id);
}
@Override
public Map<String, Object> getClaims() {
return attributes;
}
@Override
public OidcUserInfo getUserInfo() {
return null;
}
@Override
public OidcIdToken getIdToken() {
return null;
}
}
5. 로그인 성공 시 핸들러
@Slf4j
@Component
@RequiredArgsConstructor
public class OAuth2AuthenticationSuccessHandler extends SimpleUrlAuthenticationSuccessHandler {

    private final JwtTokenProvider jwtTokenProvider;
    private final JwtProperties jwtProperties;
    private final RefreshTokenService refreshTokenService;

    @Value("${server.domain}")
    private String domain;

    @Override
    public void onAuthenticationSuccess(HttpServletRequest request, HttpServletResponse response,
                                        Authentication authentication) throws IOException, ServletException {
        UserPrincipal userPrincipal = (UserPrincipal) authentication.getPrincipal();

        JwtDTO tokens = jwtTokenProvider.generateTokens(userPrincipal.getId(), userPrincipal.getRole());

        refreshTokenService.saveRefreshToken(
                userPrincipal.getId(),
                tokens.refreshToken(),
                jwtProperties.getRefreshTokenExpiration()
        );

        CookieUtil.addRefreshTokenCookie(
                response,
                domain,
                tokens.refreshToken(),
                jwtProperties.getRefreshTokenExpiration()
        );

        log.info("OAuth2 login success - userId: {}, socialType: {}, email: {}, status: {}",
                userPrincipal.getId(), userPrincipal.getSocialType(),
                userPrincipal.getEmail(), userPrincipal.getStatus());

        // 온보딩 완료 여부에 따라 리다이렉트
        boolean isRegistered = userPrincipal.getStatus() == UserStatus.ACTIVE;
        String targetUrl = String.format(jwtProperties.getRedirectUri(), isRegistered, tokens.accessToken());

        getRedirectStrategy().sendRedirect(request, response, targetUrl);
    }
}
로그인 성공 시 JWT 토큰을 자체 발급하여 액세스 토큰을 반환하고,
리프레시 토큰은 쿠키에 담아서 보낸 뒤 Redis에 저장하도록 진행했습니다.
그리고 다시 클라이언트로 리다이렉트까지 진행했습니다.
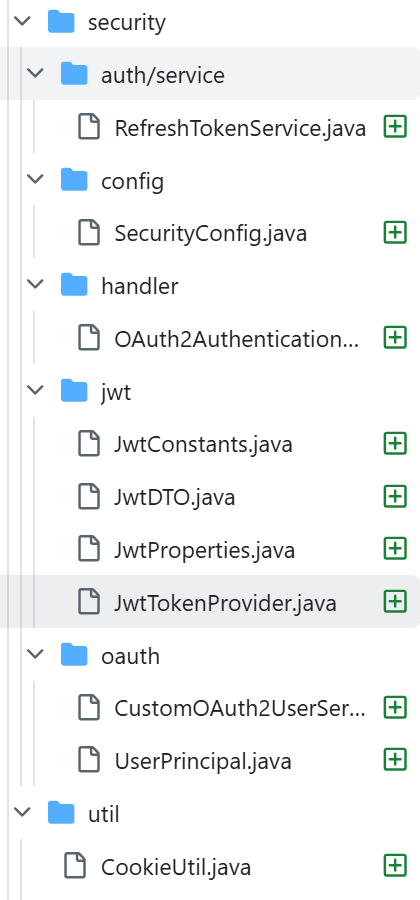
패키지 구조는 다음과 같이 구성했고, Jwt 패키지는 설명이 많이 필요하지 않을거 같아 제외합니다.
느낀 점
카카오 소셜 로그인 문서와 Spring Security 문서를 열심히 보며 구현하다 보니
소셜 로그인이 생각보다 쉽지 않다는 걸 실감했습니다...
앞으로 JWT 토큰 관리나 로그아웃 회원탈퇴까지 구현해야 하는데 꽤 시간이 걸릴듯 합니다.
'프로젝트 > Techfork' 카테고리의 다른 글
| [26/01/23] 오늘의 개발 일지 - baseUrl 문제 해결 및 쿠키 도메인 에러 해결 (0) | 2026.01.23 |
|---|---|
| [26/01/20] 오늘의 개발 일지 - CI에서 테스트 실행 및 통합 테스트 컨테이너 환경 개선 (1) | 2026.01.20 |
| [26/01/10] 오늘의 개발일지 - 온보딩 API 수정, 테스트 코드 작성, 엔티티 생성 성능 최적화 (0) | 2026.01.11 |
| [26/01/07] 오늘의 개발 일지 - Resilience4j 설정 개선 및 JdbcTemplate를 활용한 배치 처리 (0) | 2026.01.08 |
| [26/01/06] 오늘의 개발일지 - AsyncItemProcessor의 도입과 Spring Batch 메타데이터 활용 (0) | 2026.01.07 |